| MH3: Jhen Mohran, Hallowed Jhen Mohran and Dah'ren Mohran Music Theme Part 1 |
| MH3: Jhen Mohran, Hallowed Jhen Mohran and Dah'ren Mohran Music Theme Part 2 |
| Jhen Mohran | |
|---|---|
| |
| English Name: | Jhen Mohran |
| Nicknames: | Jhen |
| Titles: | Crest Mountain Dragon |
| Romaji: | Jien Moran |
| Japanese Name: | ジエン・モーラン |
| Japanese Title: | 峯山龍 |
| Korean Name: | N/A |
| Species: | Elder Dragon |
| Element/s: | None |
| Ailment/s: | None |
| Weakest to: | |
| Weakness Sign: | None |
| Signature Move: | Body Slam |
| Habitats: | Great Desert |
| Size: | 11161.9 cm |
| Monsters in Relation: | Hallowed Jhen Mohran, Dah'ren Mohran |
| First US/EU Appearance: | File:Logo-MH3.png (2010) |
| First JP Appearance: | File:Logo-MH3JP.png (2009) |
| Latest Appearance: | |
| Generation: | 3 |
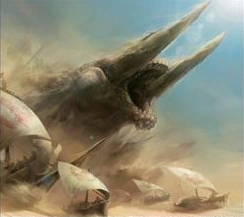
Jhen Mohran is a huge Elder Dragon found in Monster Hunter 3, Monster Hunter Portable 3rd, and in Monster Hunter 3 Ultimate.
Physiology
The people of Loc Lac have a festival when it comes. The Guild master hires hunters to repel it, where on the quest they jump on its back and mine ores from it.
Behavior
Jhen Mohran is a relatively calm creature, but has been known to retaliate against Desert/Dragon Ships if attacked as they see them as potential rivals. It takes little notice of hunters climbing on its back, and will only occasionally try to fling them off.
Habitat
It lives only in the Great Desert.
Breakable Parts
| Left Arm |
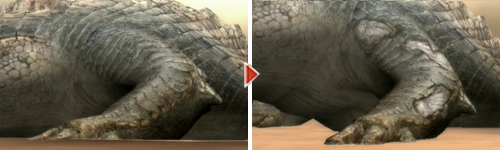
|
| Right Arm |
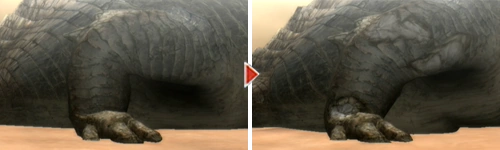
|
| Spine Cracks (x2) |

|
| Left & Right Tusks |

|
Elemental/Status Effectiveness
Monster Hunter 3
|
| |||||||||||||||||||||||||||||||||||||||||||||||||||||||||||||||||||||||||||||||||||||||||||||||||||||||
Monster Hunter Portable 3rd
Information is taken from mhp3rd.net
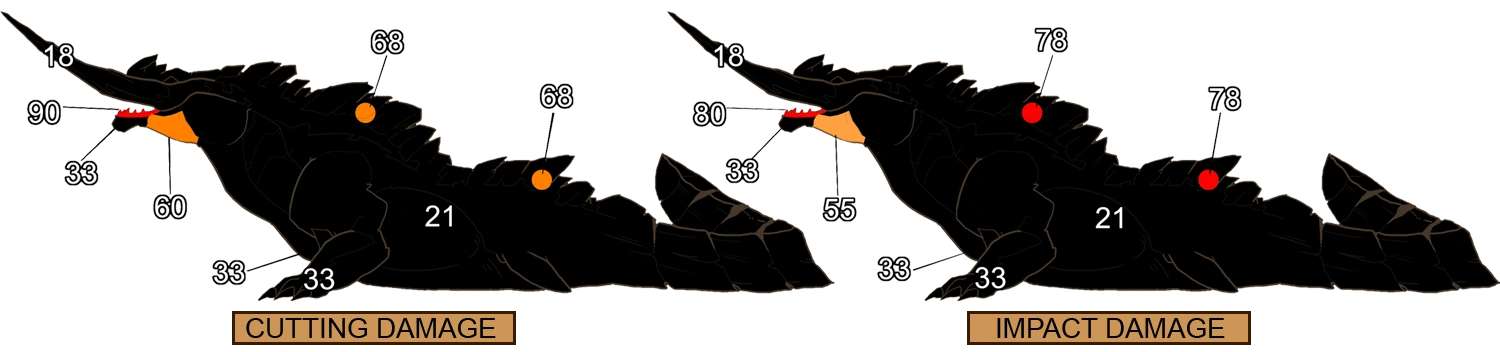
| Hitzone | Cut. D. | Imp. D. | Shot D. | |||||
| Right Tusk | 18 | 18 | 18 | 0 | 5 | 5 | 15 | 15 |
| Left Tusk | 21 | 21 | 20 | 0 | 5 | 5 | 8 | 8 |
| Body | 60 | 55 | 38 | 0 | 12 | 12 | 22 | 22 |
| Arms | 35 | 35 | 40 | 0 | 10 | 5 | 15 | 15 |
| Back | 33 | 33 | 25 | 0 | 8 | 8 | 15 | 15 |
| Spine Cracks | 68 | 78 | 55 | 0 | 15 | 15 | 22 | 22 |
| Mouth | 90 | 80 | 60 | 0 | 20 | 20 | 30 | 25 |
Item Effectiveness
| Item Effect | |||||
| Item Name | Able | Effectiveness | Duration | Notes | |
| 1st time | 2nd time | ||||
| Pitfall Trap | x | ☆☆☆ | |||
| Shock Trap | x | ☆☆☆ | |||
| Flash Bomb | x | ☆☆☆ | |||
| Sonic Bomb | x | ☆☆☆ | Hunting gong is used. | ||
| Dung Bomb | x | ☆☆☆ | |||
| Meat | x | ☆☆☆ | |||
Damage Effectiveness
For the damage formula (how it's calculated), hitzone charts, Jhen Mohran info and more click the following links: Monster Hunter 3 Damage Formula or Monster Hunter 3 Hitzone Charts. Images created by Inkoseh.
In-Game Description
| ||||||||||||
Battle
The initial battle is fought from a moving sand ship with the Jhen Mohran swimming beside it. Players can damage it by using the ship's weaponry, or by attacking it with their own weapons. Ship weapons include the Ballista S (which deals 30 damage for each spear, for a total of 60), Cannon S (which does 120 damage), Dragonator (which does 255 damage for each "segment" that penetrates Jhen's body, for a possible total of 1020 damage), the Ballista Binder and the Hunting Gong. The Ballista Binder, Dragonator, and the Hunting Gong can be reused after a certain time frame. The Ballista Binder takes around 2.5 minutes until it's reusable, and the Hunting Gong around 4.5 minutes. The Dragonator can be reused after about 7.5~9 minutes, however there are limited opportunities to deal damage with it. There are infinite reserves of Cannon S and Ballista S in the online MH3 version, as opposed with in the MHP3 and MH3U versions. It is also possible to jump onto its back to mine for scales and ores, or to attack its 2 weakpoints on its back. Jhen Mohran's spinal ridge contains 2 cracks/cavities. Enough damage done to these weakpoints will break a hole through them. Anti-Dragon Bombs from the supply box deal fixed 400 damage to any body part, can be boosted by the Bombardier skill, and thus are ideal for breaking Jhen's tusks. Anti-Dragon Bombs will detonate automatically after approximately 10 seconds. Both tusks can be broken.
The battle will then switch to a land based scenario as Jhen Mohran crawls towards the port side of the ship, positioned at the entrance of something that seems like a path leading to the city. At this point, players can attack its arms to break them for extra rewards and help slow it down/stagger it, or continue to fire ballistae from a long range. As it heads toward the ship, it will occasionally hurl rocks at the Ballista or cannon stations, as well as the players (some of these shots are per-determined while others are targeted at players). Once it is close enough, Jhen Mohran will use its side sweep or perform a body slam onto the ship. The roar and body slam of Jhen Mohran are very similar, the only difference is that its belly will vibrate when it tosses its head to the left before rising when it roars. It also moves it head to different sides depending on which attack it is going to use (roar or slam) however this could have been changed since MH3. When Jhen Mohran does his body slam, causing the Gong to sound when he descending will cause him to stagger to his side, revealing his underbelly for a brief moment. By sounding the gong when he is at the apex of his slam before he comes down, or by doing enough damage, instead of him staggering, he will fall upside down. This will enable players to enter his mouth. This allows for them to either get 2 carves or deal some extra damage in his mouth (which is a major weak point). During the land battle, the Dragonator is relocated to the side of the ship, at the bow, still using the same trigger.
Jhen Mohran is often seen with Delex; the two species share a commensalistic relationship in which every time Jhen Mohran feeds, the Delex swim in and eat the left overs.
Notes
General Notes
- The quest is fought on a boat named the Dragonship and later on a sandy expanse. The Dragonship has a dragonator, 2 Ballistae and 2 Cannons. A Ballista Binder and a Hunting Gong are located on the ship too.
- The Dragonator can be used up to four times in the quest, twice in each phase. However, this is not recommended and as of MH3U player can only actually hit him 3 times.
- The Ballista Binder and the Hunting Gong are both used to stagger the Jhen Mohran. If timed right, they will cancel an attack. Both the Gong and the Binder have a recharge time.
- As mentioned above, the Dragonator can be used up to 4 times in the quest, the first during its shoulder charge from the starboard side of the ship, the second during its head on charge, and twice during the 'final showdown' or stationary section. However, in MH3U the developers have caused the Jhen to shift towards the left side of the area, away from the dragonator, so while it might recharge for the 4th activation its impossible to actually hit Jhen Mohran.
- BE AWARE, If attempting to achieve both hits during the first section, the player has to make 'good use' of the gong and binder as well as breaking every accessible point, and staggering it a few times, otherwise the Dragonator WILL NOT have enough time to recharge before Jhen does its head on charge, which does major damage to the ship.
- If Jhen Mohran destroys the Dragonship, it ends the quest and the hunters fail. Even after entering the second phase of the battle, players still fail if it is destroyed.
- Both tusks and the two spine cracks can be broken, and its two arms can be damaged.
- When both its tusks are broken, its right one is longer than the left to ensure that players can still get on its back while its off the port side.
- Jhen Mohran's armor sets are named after Japanese battleships and aircraft carriers: Yamato, Mutsu, Amagi, Hyuga.
- Jhen Mohran's Long Sword is a Chinese pole weapon that is currently used in some forms of Chinese martial arts. In Chinese it is properly called a 偃月刀 yan yue dao ("reclining moon blade"). It is comparable to a European fauchard or glaive and consists of a heavy blade with a spike at the back and sometimes also a notch at the spike's upper base that can catch an opponent's weapon. In addition there are often irregular serrations that lead the back edge of the blade to the spike. The blade is mounted atop a 5–6 foot long wooden or metal pole with a pointed metal counter weight used to balance the heavy blade and for striking on the opposite end. The blade is very deeply curved and therefore unlike most polearms, solely useful for sweeping cuts where it relies on range and power. Also known as a Guan Dao, it is useful against soldiers on horseback. It also evolves from the Arzuros Longsword, which is a supposed Naginata.
- The "Mohran" may come from the word Moraine which is a rocky accumulation of glacial debris.
Monster Hunter 3
- Jhen Mohran can no longer be hunted because the online servers have been shut down.
- Hunters climbing back to the ship on the ships could be hit by rocks thrown by Jhen Mohran.
Monster Hunter Portable 3rd
- Felyne Comrades, when brought, can operate Cannons and Ballistae, but cannot climb on Jhen Mohran's back.
- Now, Jhen Mohran can be fought offline at the end of Village Quests.
- In the last Low Rank urgent quest, Jhen Mohran is fought only during the sand ship part, during 20 minutes, similarly to the Low Rank event quest in Monster Hunter Tri. During this fight, Jhen Mohran can only be repelled and will deal more damage to the ship with some of its attacks. For example, its charges toward the ship drops 20% of the ship's integrity.
- In High Rank, Jhen Mohran is the last Urgent Quest before Amatsumagatsuchi is unlocked.
- Cannon and Ballista Ammo are limited in Monster Hunter Portable 3rd, which explains the large amounts of Ballista Ammo in the Supply Box at the beginning of the Quest.
Monster Hunter 3 Ultimate
- It has a new attack that shoots a tunnel of sand from its mouth to the ship in the second phase of the quest. This sends hunters flying and can damage the ship. G ranked Jhen Mohran and Hallowed Jhen Mohran both use the sand blast attack.
- The Villager Request Dragonship Duty must be completed before acquiring this quest. It is also a High Rank Quest.